


TurnKeyInfo
How Often Should A Soft Serve Ice Cream Machine Be Cleaned?
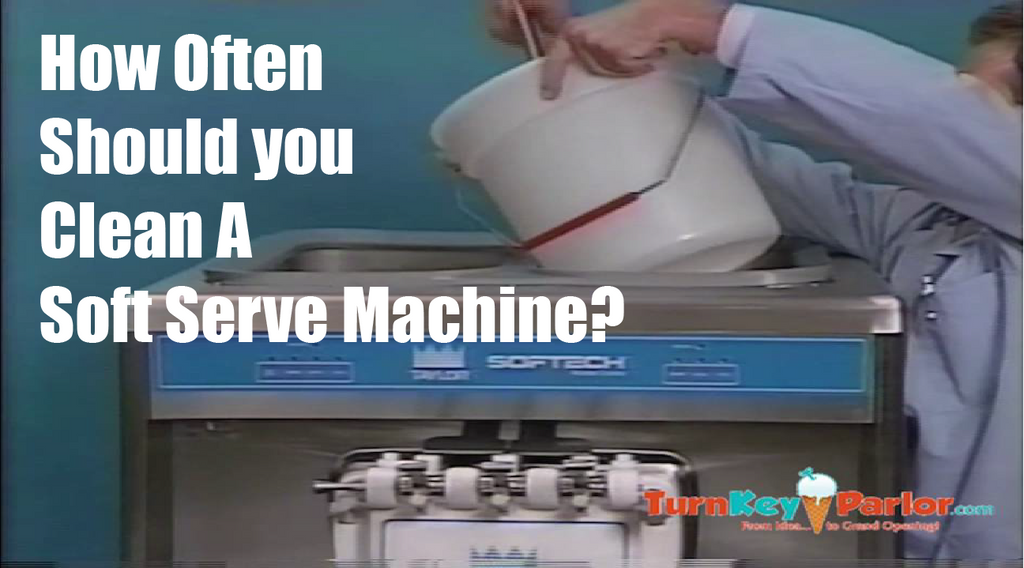
How Often Should You Clean Your Soft Serve Ice Cream Machine?
In the world of frozen desserts, clean and sanitised appliances are crucial. This is particularly true for soft serve ice creams. This article will explore the importance of cleaning soft-serve ice cream machines and offer some advice on the frequency and methods of cleaning such a crucial food service tool.
If you are looking for instructions for cleaning your soft serve ice cream machine, click here to skip ahead to that section!
Understanding what soft serve ice cream machine is
A soft serve ice cream machine is a unique piece of food service equipment, designed to churn and freeze the ice cream mix into the soft, fluffy texture we associate with soft-serve. The machine is integral in ensuring the consistency of the ice cream, making it a uniquely specific apparatus within the frozen dessert sector.
Distinction Between Soft Serve and Regular Ice Cream
Unlike your regular ice cream, soft serve is not hard-frozen. Soft serve ice cream machines are designed to keep the ice cream at a slightly warmer temperature, preventing it from freezing too hard and maintaining that distinctive softer consistency. The difference lies in both the recipe and the machine?s unique processing functions.
Soft Serve and Frozen Yogurt: Spotting the Difference
While the texture of soft serve and frozen yogurt can be similar, both require different handling. The dairy base for frozen yogurt is different to that of soft-serve ice cream, necessitating distinct operating measures on the same machine. Consumers often confuse the two, but they indeed require different measures in food service management, especially in cleaning and maintenance.
Operation of Soft Serve Ice Cream Machines: A Brief Overview
Operating a soft-serve ice cream machine involves pouring the mix into the hopper, where it?s churned by blades and cooled by a refrigeration system inside the machine. During the day, the machine should be run to keep the ice cream at the desired temperature and texture. Naturally, this daily operation requires frequent cleaning to maintain hygiene and performance. Understanding the machine's mechanics can greatly help in cleaning the machine more efficiently.
Importance of Regular Cleaning and Sanitizing the Soft Serve Ice Cream Machine
For the smooth and safe operation of a soft serve ice cream machine, both cleaning and sanitizing the machine are critical aspects of its maintenance. Regular maintenance helps ensure the quality of the soft-serve ice cream, the longevity of the machine, and compliance with local health regulations.
Importance of Hygiene in Frozen Dessert Operations
The cleanliness of a soft-serve machine directly impacts the hygiene, taste, and quality of the soft-serve ice cream served. An unclean machine can contaminate the ice cream, causing risks to consumers' health and the reputation of your business. This makes regular cleaning and maintenance vital, and professional machine hygiene solutions such as hydra rinse could be helpful in achieving this.
Impact of Cleanliness on the Quality of Soft Serve Ice Cream
Regular cleanup and hygiene practices help maintain the quality and flavor of soft-serve ice cream. Leftover residues in the machine can degrade the taste and texture of the soft-serve. Cleaning your machine consistently can also prevent clogging, ensuring the machine runs smoothly and able to dispense soft, consistent ice cream every time.
Risks and Consequences of an Unclean Soft Serve Machine
If the machine is not cleaned regularly, leftover ice cream mix can harden and cause operational issues. This can lead to wear and tear, and even serious damage to the machine?s motor or blades. It can also potentially pose a health risk, as bacteria and mould can accumulate in an unclean machine.
Recommended Cleaning Frequency for Soft Serve Ice Cream Machines
As a basic rule, a commercial soft serve ice cream machine should be cleaned and sanitized after every day of operation. However, aspects like machine usage, local health codes, and manufacturer?s instructions can determine the specific cleaning frequency.
Understanding Cleaning Frequency
The cleaning frequency of your soft serve machine depends on the model, usage and local health regulations. A machine in a busy location may need complete cleaning every night, while a low-volume unit might suffice with a deep clean every few days. Regardless, all machines require routine daily cleaning to ensure quality and performance.
Factors Influencing Cleaning Frequency
Several factors can impact your cleaning frequency. If you're serving soft serve ice cream in a place with warm temperatures, you might need to clean more often. The volume and diversity of flavors served can also affect cleaning frequency. Lastly, the manufacturer's recommendations and local health department guidelines can also dictate the frequency at which your machine should be cleaned.
Industry Standards for Ice Cream Machine Cleaning
Each commercial soft serve machine comes with an owner?s manual detailing the recommended cleaning procedures and frequency. These guidelines, combined with local health codes, represent the industry standards for machine cleaning. It is crucial to follow these recommendations to maintain your machine?s performance and longevity.
Step-by-Step Guide to Cleaning, Sanitizing, and Lubricating Soft Serve Ice Cream Machines
Cleaning a soft serve machine involves several steps. It?s crucial to follow each one to ensure the machine is cleaned and sanitized thoroughly and ready for the next operation.
Rinsing
- Fill the mixing hopper with 2 gallons (7.6 liters) of cool, pure water. Use the supplied brushes to clean the mixing hopper, the mix inlet, and the level sensing probe.
- Place a bucket under the door's spout, lift the prime plug, and then hit the WASH button.
- Once a continuous flow of rinsing water starts coming out from the prime plug hole at the bottom of the freezer door, lower the handle to empty the freezing cylinder. Then, lift the handle and hit the WASH button to exit the WASH mode.
- For models 754, 774, 791, and 794, repeat steps 1-3 for the freezer's other side.
Note: For cleaning, use warm water and adhere to the manufacturer's guidelines.
Cleaning
- Make a certified 100 PPM cleaning mixture (e.g., 2.5 gallons [9.5 liters] of Kay-5 or 2 gallons [7.6 liters] of Stera-Sheen).
- Depress the prime plug and pour the cleaning liquid into the mix hopper.
- As the solution flows into the freezing cylinder, scrub the mix hopper, level sensing probe, and mix inlet hole using a brush.
- Press the WASH button to stir the cleaning liquid inside the freezing cylinder.
- Position an empty bucket under the spout of the door and lift the prime plug.
- When a continuous flow of cleaning liquid comes out from the prime plug hole at the bottom of the freezer door, lower the handle to drain all the solution.
- Once the cleaning liquid ceases to flow from the door spout, lift the handle and hit the WASH button to deactivate the WASH mode.
- For models 754, 774, 791, and 794, perform steps 1-7 again on the opposite side of the freezer.
Disassembly
WARNING: ENSURE THE POWER SWITCH IS SET TO 'OFF.' Neglecting this step could result in serious hand or finger injuries due to dangerous moving components.
- Detach the hand screws, freezer doors, beaters, scraper blades, and drive shafts from the freezing cylinders. Take these components to the sink for washing.
- Take off the front drip tray and splash guard.
Manual Brush Cleaning
Adhere to the cleaning frequency as dictated by your local, state, or federal regulations. Refer to your local food safety guidelines for the maximum days allowed between brush cleanings.
Follow either the cleaning procedure in the manual or an alternative method that is certified by NSF in combination with a sanitizing system.
- Fill a sink with an authorized cleaning agent (e.g., Kay-5 or Stera-Sheen).
Note: Use warm water and comply with the manufacturer's guidelines.
If using a different approved cleaner, dilute as per the label's instructions.
Important: Stick to the dilution instructions on the label. An overly concentrated mixture may damage parts, while a weak one won't clean effectively.
- Ensure all brushes that came with the freezer are ready for use.
- Take out the seals from the drive shafts.
From each freezer door, remove the following:
- Gaskets
- Front bearings
- Pivot pins
- Adjustable handles
- Design caps
- Draw valves
- Prime plugs
- All O-rings
Note: To extract O-rings, grasp them with a disposable towel and pull upward until they pop out. To completely remove, push the top part forward, and it will slide out easily. If multiple O-rings are present, remove the one at the back first.
Note: If the drip pan contains too much mix, refer to the Troubleshooting Guide.
During Cleaning and Sanitizing
Important! Abide by the cleaning and sanitizing schedules as determined by local, state, or federal health agencies. Don't use the Standby mode as a substitute for the officially mandated cleaning and sanitizing practices. Take note of the following points during cleaning and sanitizing:
Troubleshooting Bacterial Count
- Regularly disassemble, clean, and sanitize the machine, including using brush cleaning.
- Utilize all the provided brushes for comprehensive cleaning. These brushes are specifically designed to clean all mixing pathways.
- Employ the white-bristle brush for the mix inlet hole, stretching from the mix hopper to the rear end of the freezing cylinder.
- Use the black-bristle brush for cleaning the rear shell bearing at the back of the freezing cylinder. Ensure the brush is well-soaked in cleaning solution.
- If local regulations allow for mix rerun, store it in a sanitized, lidded stainless steel container for use the next day. Don't use the rerun for priming. Remove any foam and combine it with fresh mix at a 50/50 ratio during the day.
- Choose a specific day each week to run the mix to a low level and discard it after closing to break the rerun cycle and lower bacterial counts.
- Properly prepare cleaning and sanitizing solutions. Follow the label directions; an overly concentrated or diluted solution can either damage components or not clean effectively.
- Ensure the mix temperature in the hopper and walk-in cooler is below 40°F (4.4°C).
Regular Maintenance Checks
- Replace any damaged or nicked scraper blades. Before reassembling the beater, confirm that the scraper blades are securely fastened.
- Examine the rear shell bearing for wear signs like excessive mix leakage and ensure it's clean.
- Using a screwdriver wrapped in cloth, keep the rear shell bearing and 3/4 hex drive coupling free from lubricant and mix residues.
- Discard and replace worn, torn, or loosely fitting O-rings and seals.
- Stick to all lubrication procedures mentioned under Assembly.
Important! Never use metal probes like screwdrivers for cleaning between fins.
Additional Maintenance
- If air-cooled, check the condensers for dirt and lint accumulation monthly and clean with a soft brush.
Note: If equipped with an air filter, vacuum clean it monthly.
- If the machine has an auxiliary cooling system, regularly check the auxiliary condenser for lint and dirt. Clean it monthly with a soft brush.
CAUTION: Always disconnect the electrical power before cleaning the condenser to avoid electrocution risks.
- If your machine operates on a water-cooling system, regularly inspect water lines for kinks or leaks. Replace any faulty lines through an authorized Taylor distributor for continued safe and efficient machine operation.
Cleaning a Soft Serve Machine Video:
Post-Cleaning: Sanitizing and Lubricating
After all the parts are cleaned and rinsed, they should be sanitised with a recommended solution. Be sure to rinse again after sanitising. Before reassembling, all o-rings and seals should be lubricated. Once the machine is reassembled, it should be run for a few minutes with sanitizer solution in the hopper, thus sanitizing the dispensing system as well. The machine should be thoroughly rinsed again before the freshly mixed soft serve ice cream is added.
Tips for Proper Maintenance of Soft Serve Ice Cream and Shake Machines
Common Wear-and-Tear Issues and How to Prevent Them
Common wear and tear issues for soft serve machines include faulty blades, damaged o-rings, and motor problems. Regular inspections, timely replacement of worn-out parts, and proper cleaning can help prevent these issues from affecting your machine's performance.
Maintaining Other Components: The Importance of Condenser Cleaning
Beyond the components that come into contact with the ice cream mix, other machine parts, like the condenser, also need regular maintenance. A clean and efficient condenser keeps the machine running smoothly and prolongs its lifespan. Failure to maintain the condenser can lead to motor overheating and other serious issues.
Keeping a Stock of Important Replacement Parts
To avoid downtime, it's wise to have a stock of essential replacement parts such as blades, o-rings, and seals. Having these parts on hand allows for quick and easy replacements, preventing prolonged machine downtime and ensuring continuous operation.